NCache Java Edition with distributed cache technology is a powerful tool that helps Java applications run faster, handle more users, and be more reliable. In today’s world, where people expect applications to run quickly and smoothly, knowing how to use NCache Java Edition is very important. It’s a key piece of technology for both developers and businesses who want to make sure their apps can provide users with fast access to data and a smooth experience. This is why NCache Java Edition is an important part of building great applications.
This article is made especially for beginners to make the ideas and steps of adding NCache to your Java applications clear and easy to understand. It doesn’t matter if you’ve been developing for years or are new to caching, this article will help you get off to a good start with NCache Java Edition. Let’s get started with the step-by-step process for setting up an NCache development workstation with a Java setup.
NCache Server Installation: Java Edition
NCache has different setup options. The classification is given below:
- Locally
- Cloud
- Using Docker/Kubernetes
Here you can check all the implementation options and the package available for implementation.
NCache recommends at least SO-16 (16GB RAM, 8v CPU) to achieve optimal performance in a production environment, for higher transaction loads we should use SO-32, SO-64 or SO-128.
Deploying an NCache server with a Docker image
NCache provides different images (alachisoft/ncache – Docker Image | Docker Hub) for Windows and Linux platform Java edition.
Let’s see how to deploy an NCache server using the latest Linux Docker image.
Use the Docker command below to pull the latest image:
docker pull alachisoft/ncache:latest-java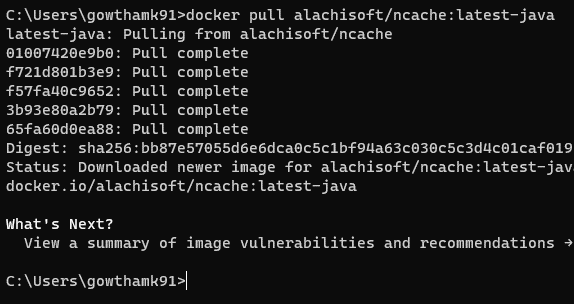
We have now successfully extracted the Docker image.
Run the Docker image using the Docker command below:
- For a development workstation:
docker run --name ncache -itd -p 8251:8251 -p 9800:9800 -p 8300:8300 -p 8301:8301 alachisoft/ncache:latest-java Use the actual host configuration for the production NCache server:
docker run –name ncache -itd –network host alachisoft/ncache:latest-java The above command will start the NCache server and listen on port 8251.
Now launch the NCache Management Center using a browser (localhost:8251). You will get a modal popup to register your license key as shown below:
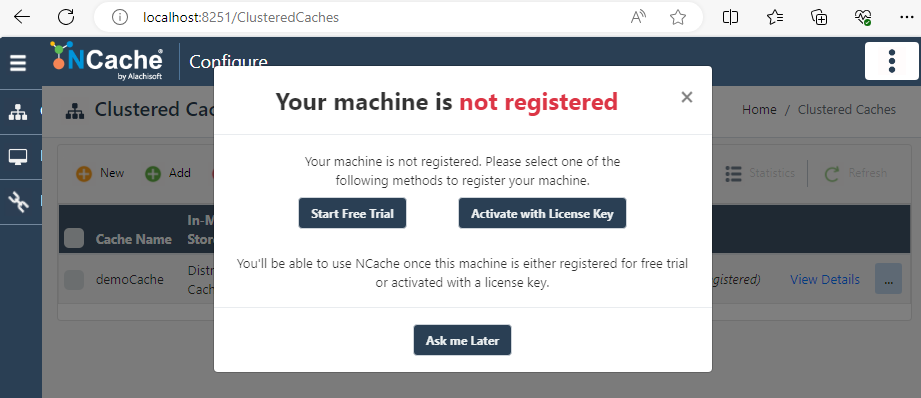
Click on Start a free trial to activate a free trial with a license key, using the form below.
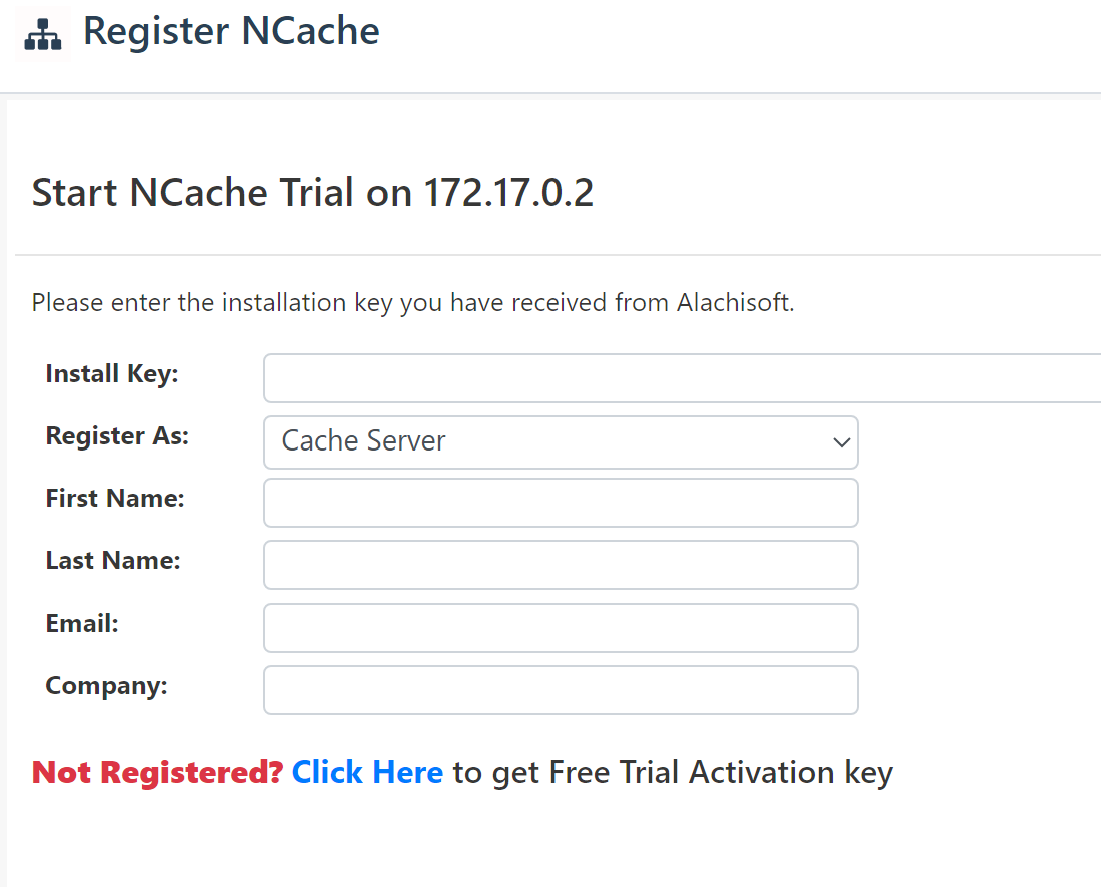
You can register your license key using this form on the registration page or by using the license key registration Docker command as listed below:
docker exec -it ncache /opt/ncache/bin/tools/register-ncacheevaluation -firstname [registered first name] -lastname [registered last name] -company [registered company name] -email [registered e-mail id] -key [key]Now open NCache Management Center from http://localhost:8251/ browser.
NCache cluster cache
Let’s install another image in another instance, with the correct network configuration. Use the document below for network configuration with NCache docker image deployment:
I placed one image in the 10.0.0.4 instance and the other in the 10.0.0.5 instance. I just jumped into the 10.0.0.4 NCache Management Center and removed the default cluster cache created during installation.
Let’s create a new clustered cache using the NCache Management Center wizard.
Click on New from Clustered Cache page as shown in the image below:
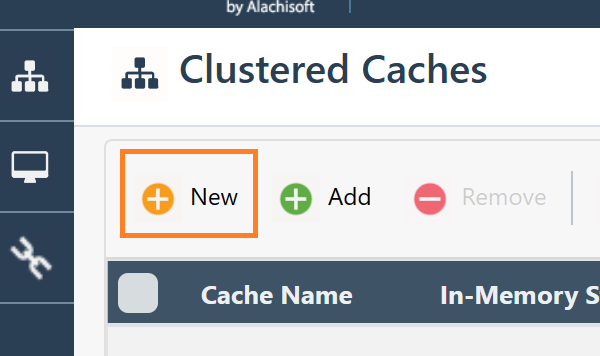
In this step, you can define the in-memory storage type, the clustered cache name, and the serialization type. In my case, I named the clustered cache as demoCache and serialization as JSON.
Step 2: Caching topology
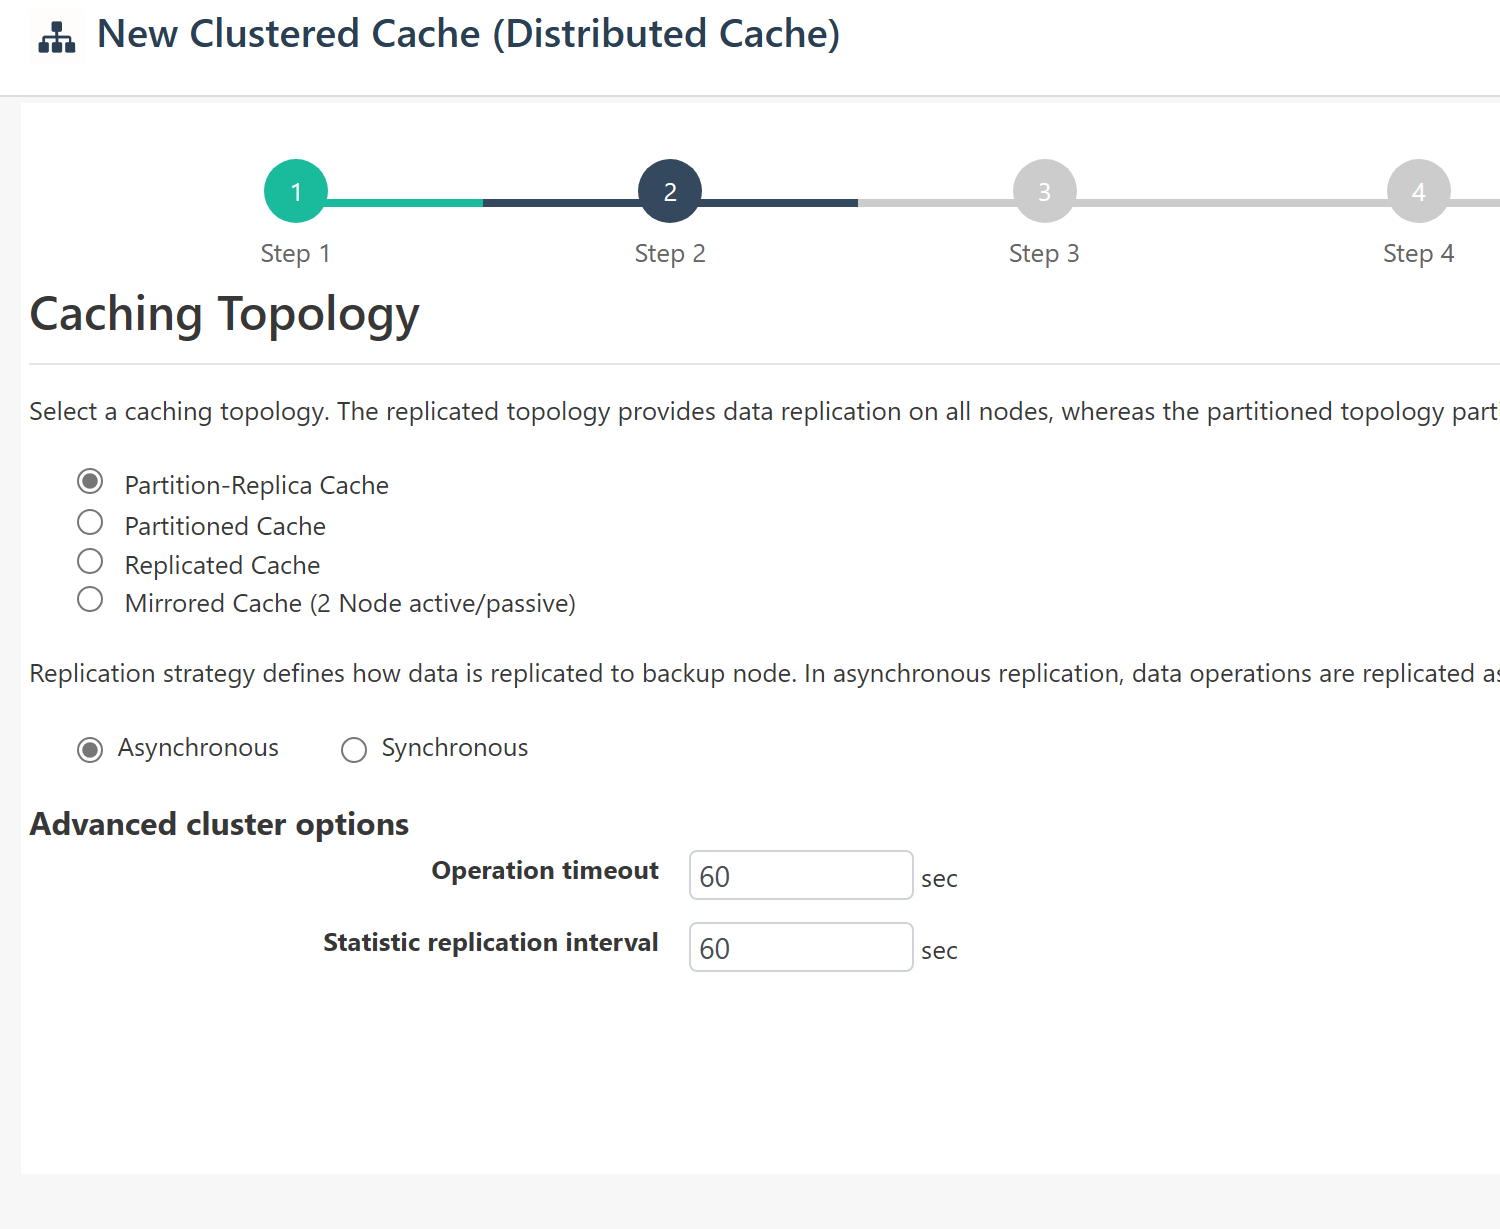
Define the caching topology on the screen; in my case, I just went with the default options.
Step 3: Partitions and cache size
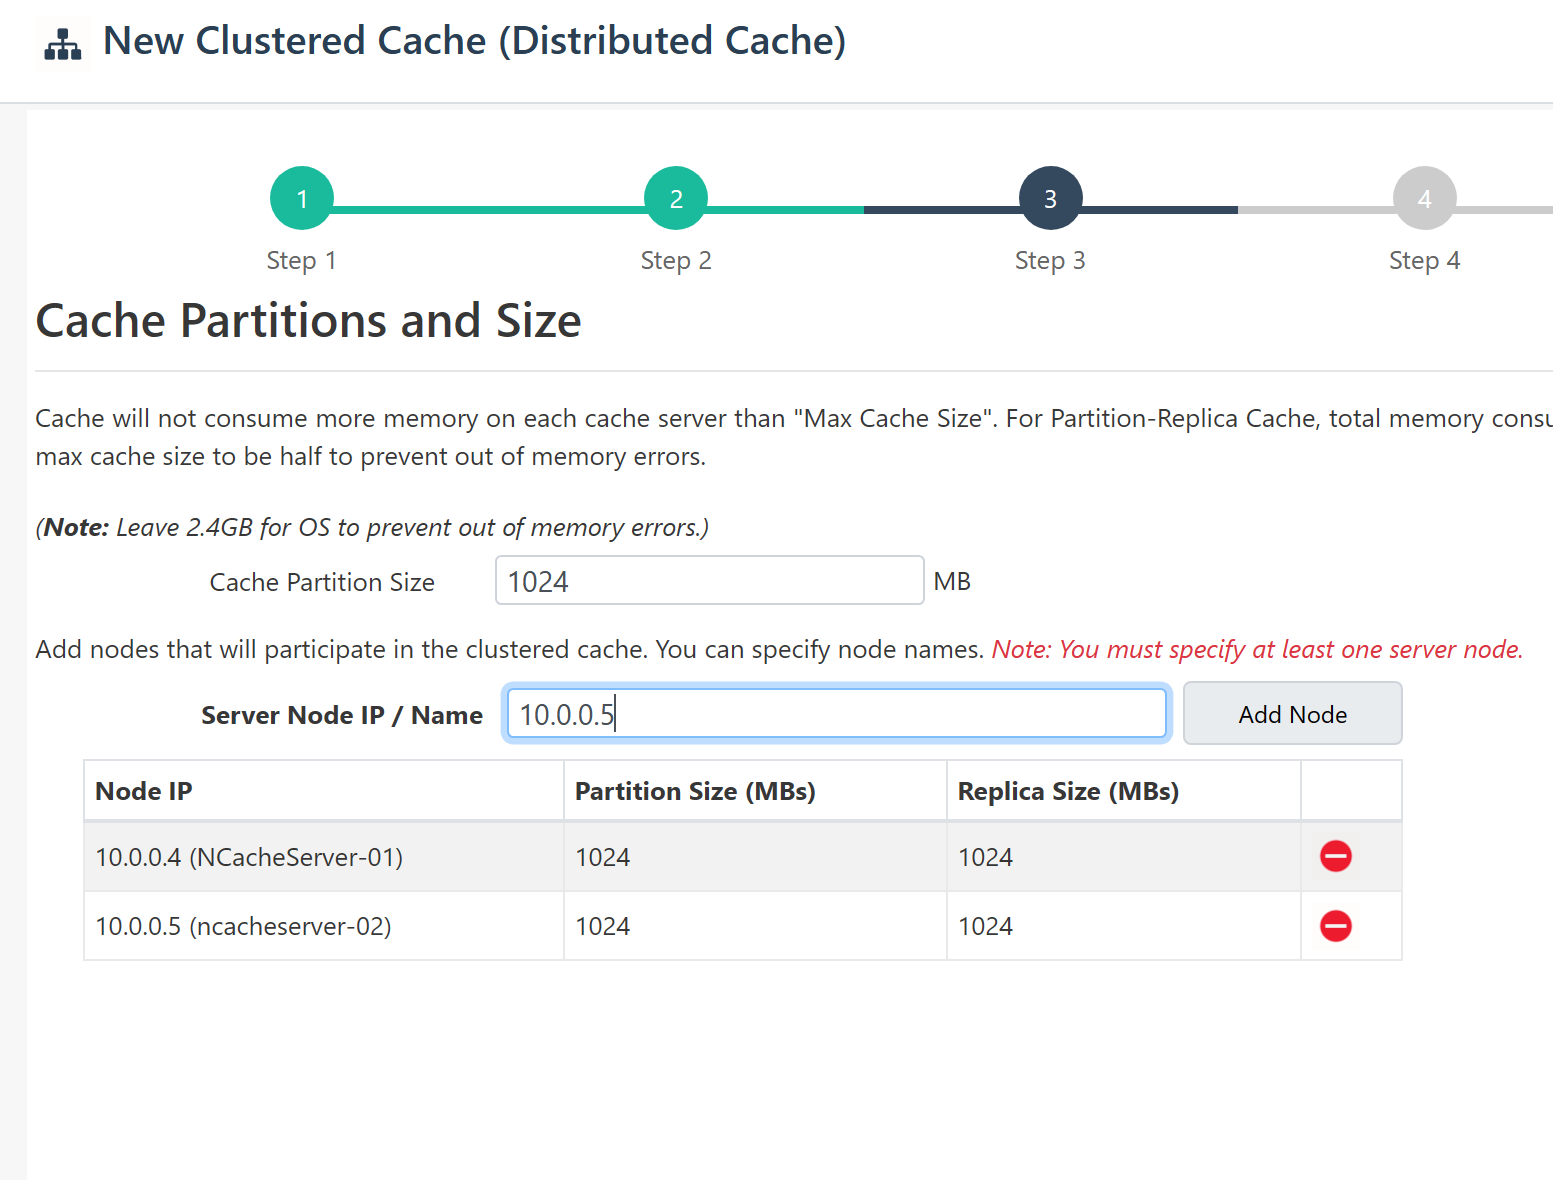
On this screen we can define the size of the cache partition. In my case, I just took the default value. This option will skip step 4.
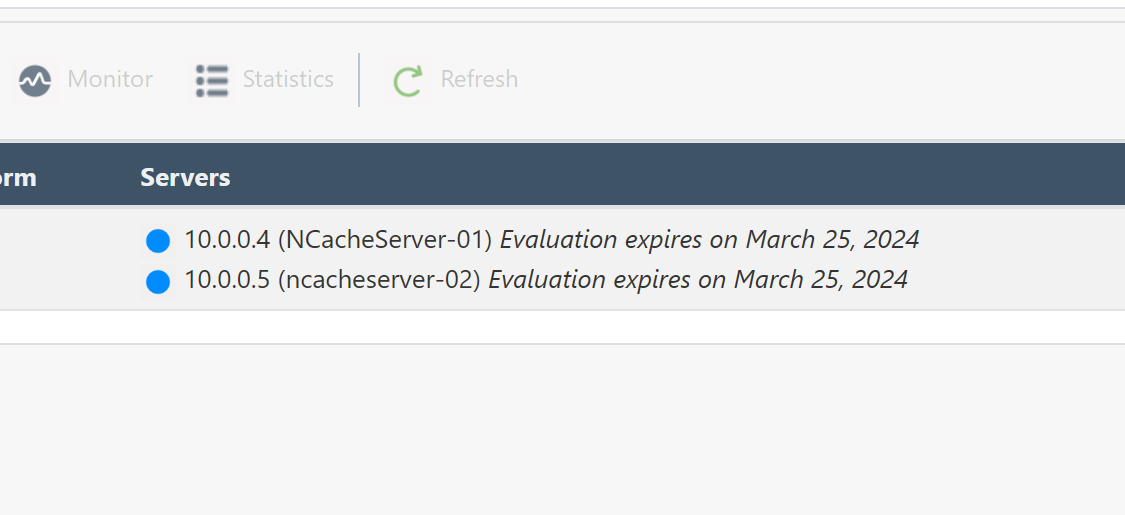
Also, I added two server nodes: 10.0.0.4 and 10.0.0.5.
Step 5: TCP cluster parameters
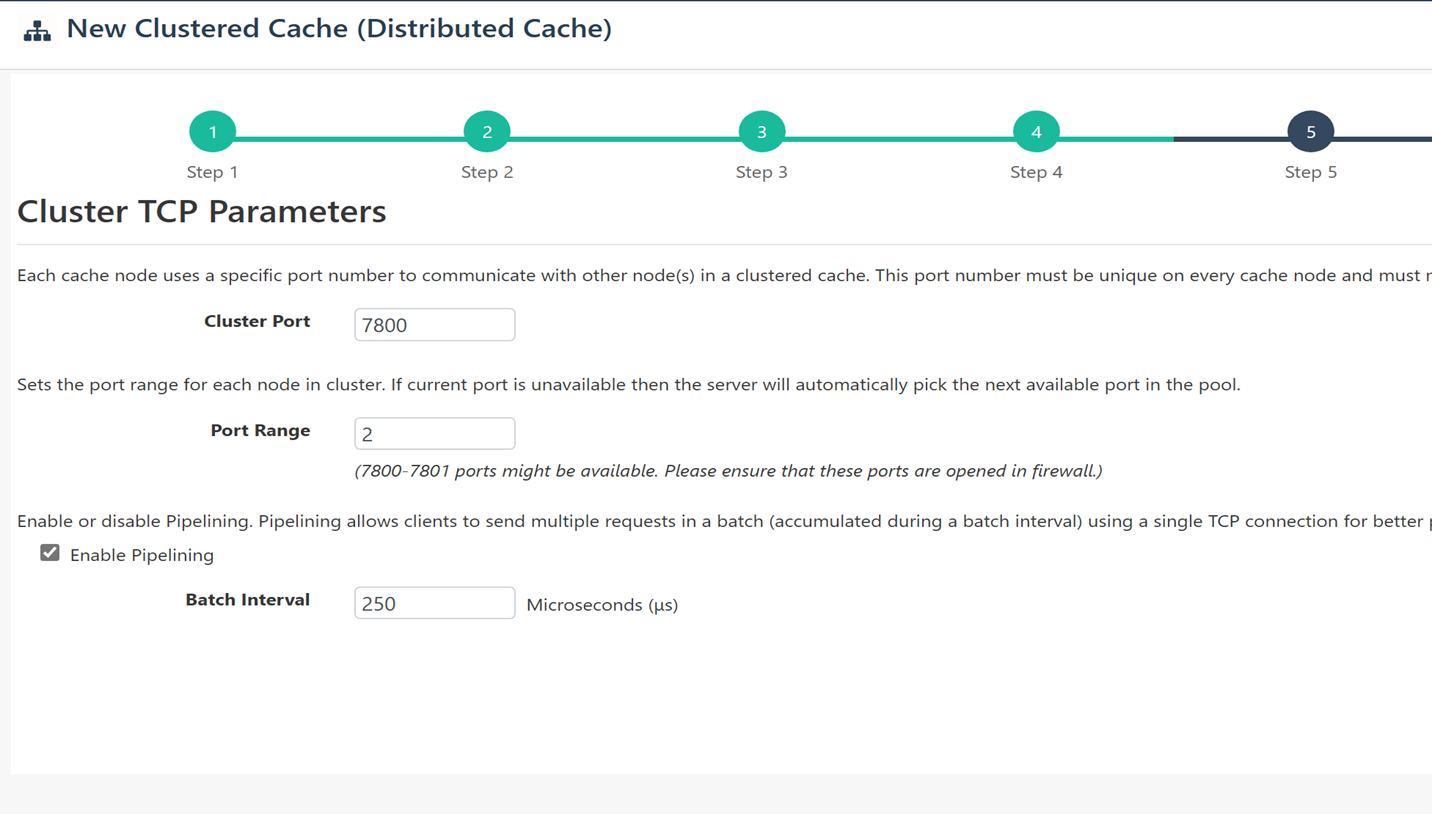
Define Cluster connection, Port Rangeand Serial interval values. In my case, I went with the default values.
Step 6: Encryption and compression settings
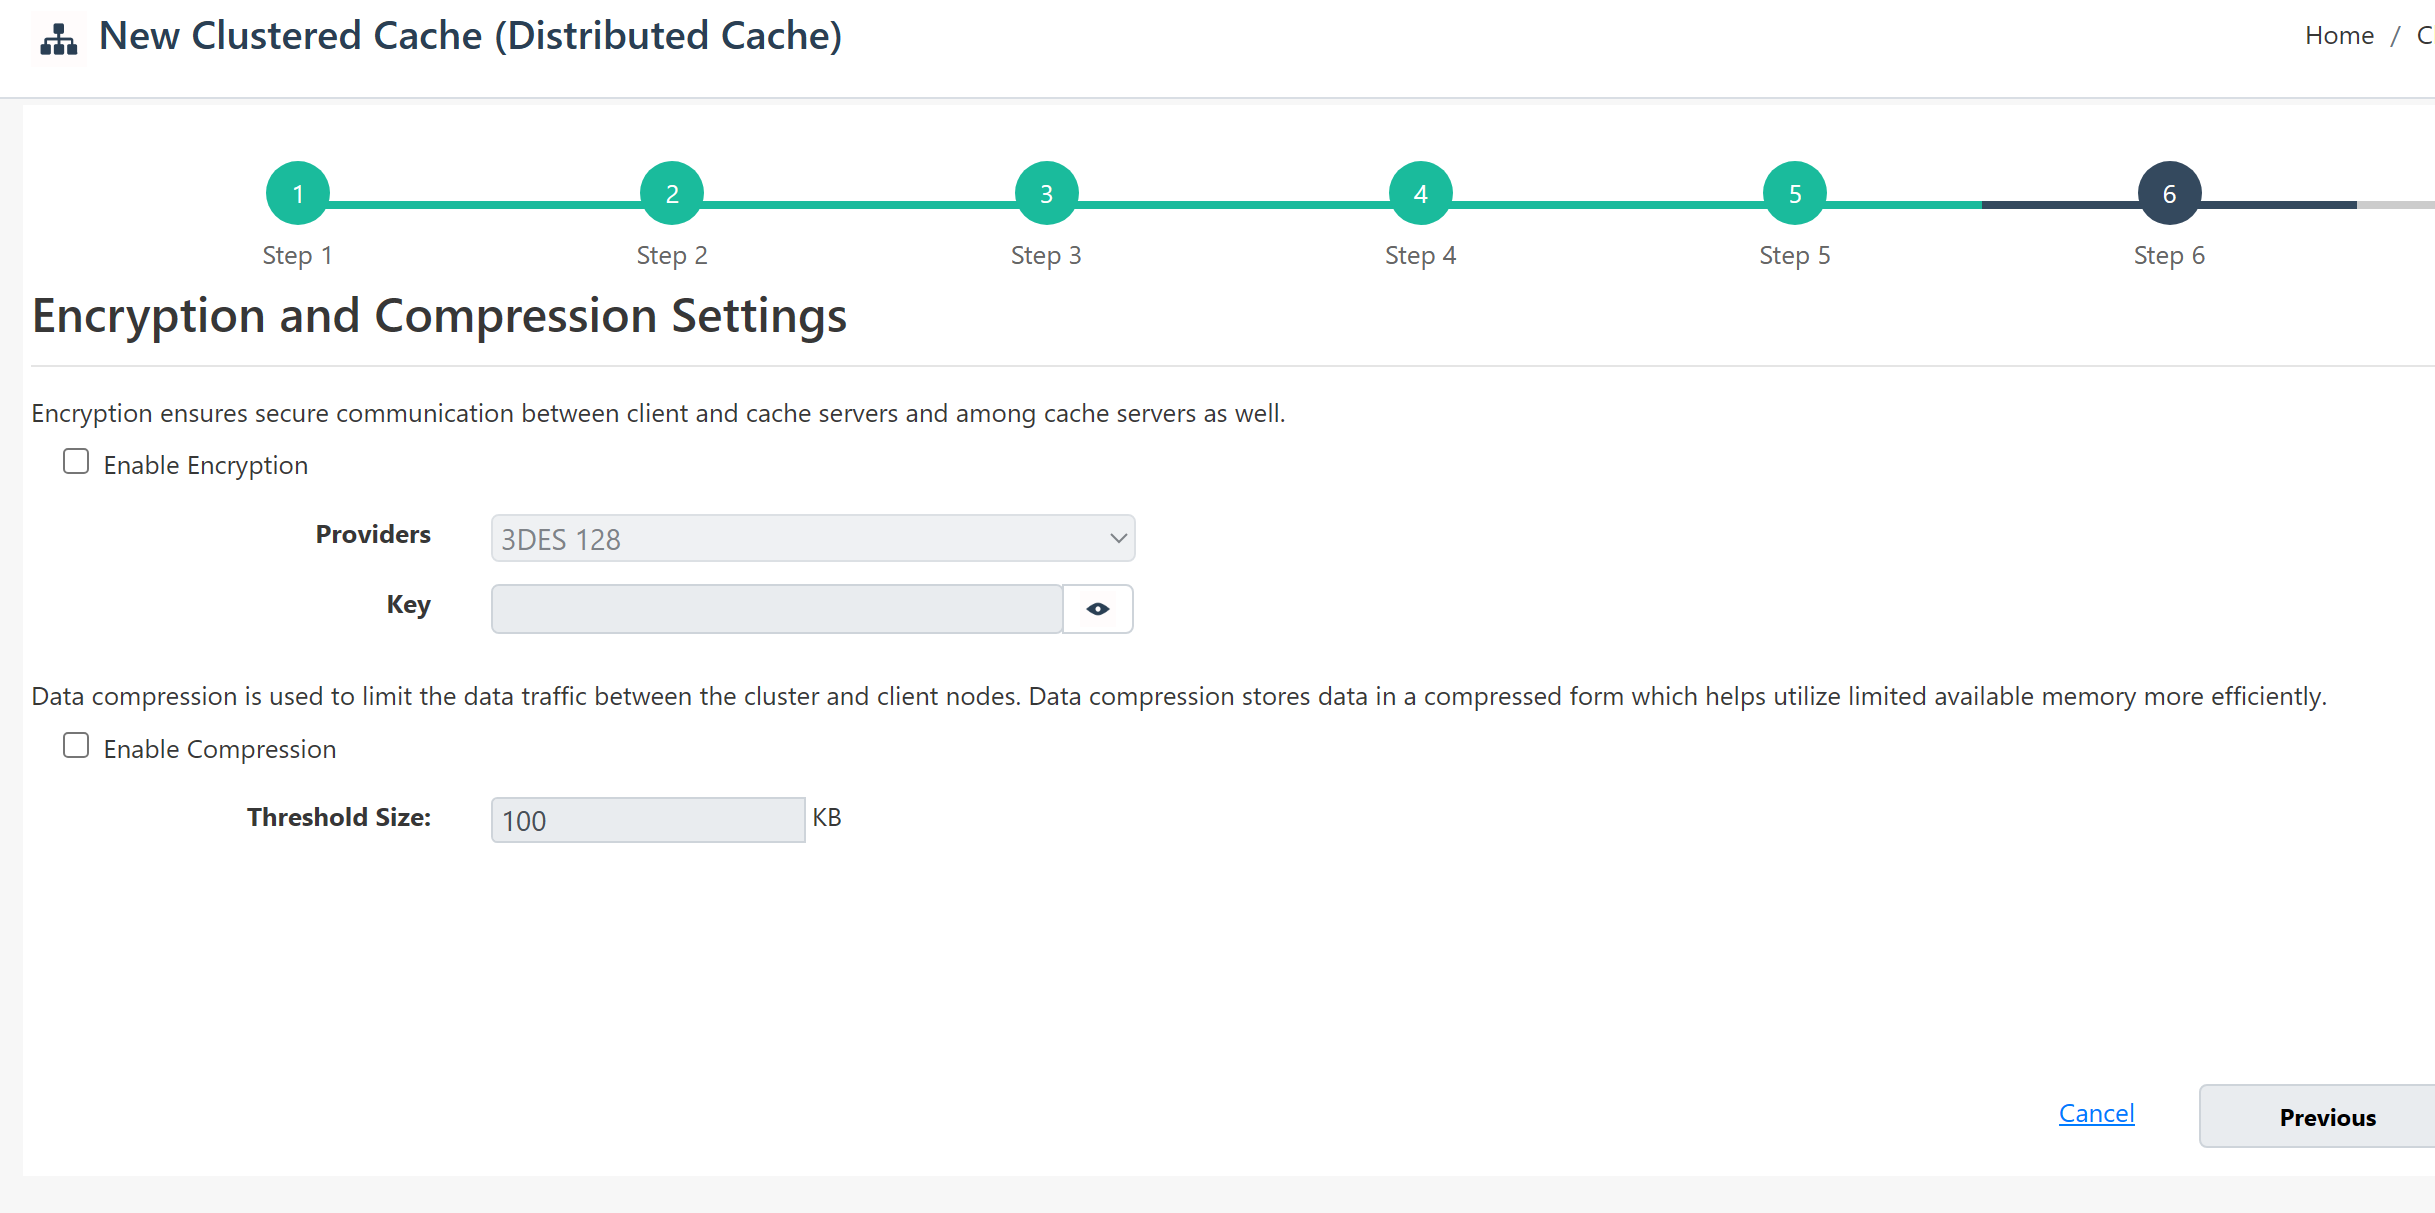
In this step, you can enable encryption and compression settings. I just started with the defaults.
Step 7: Advanced options
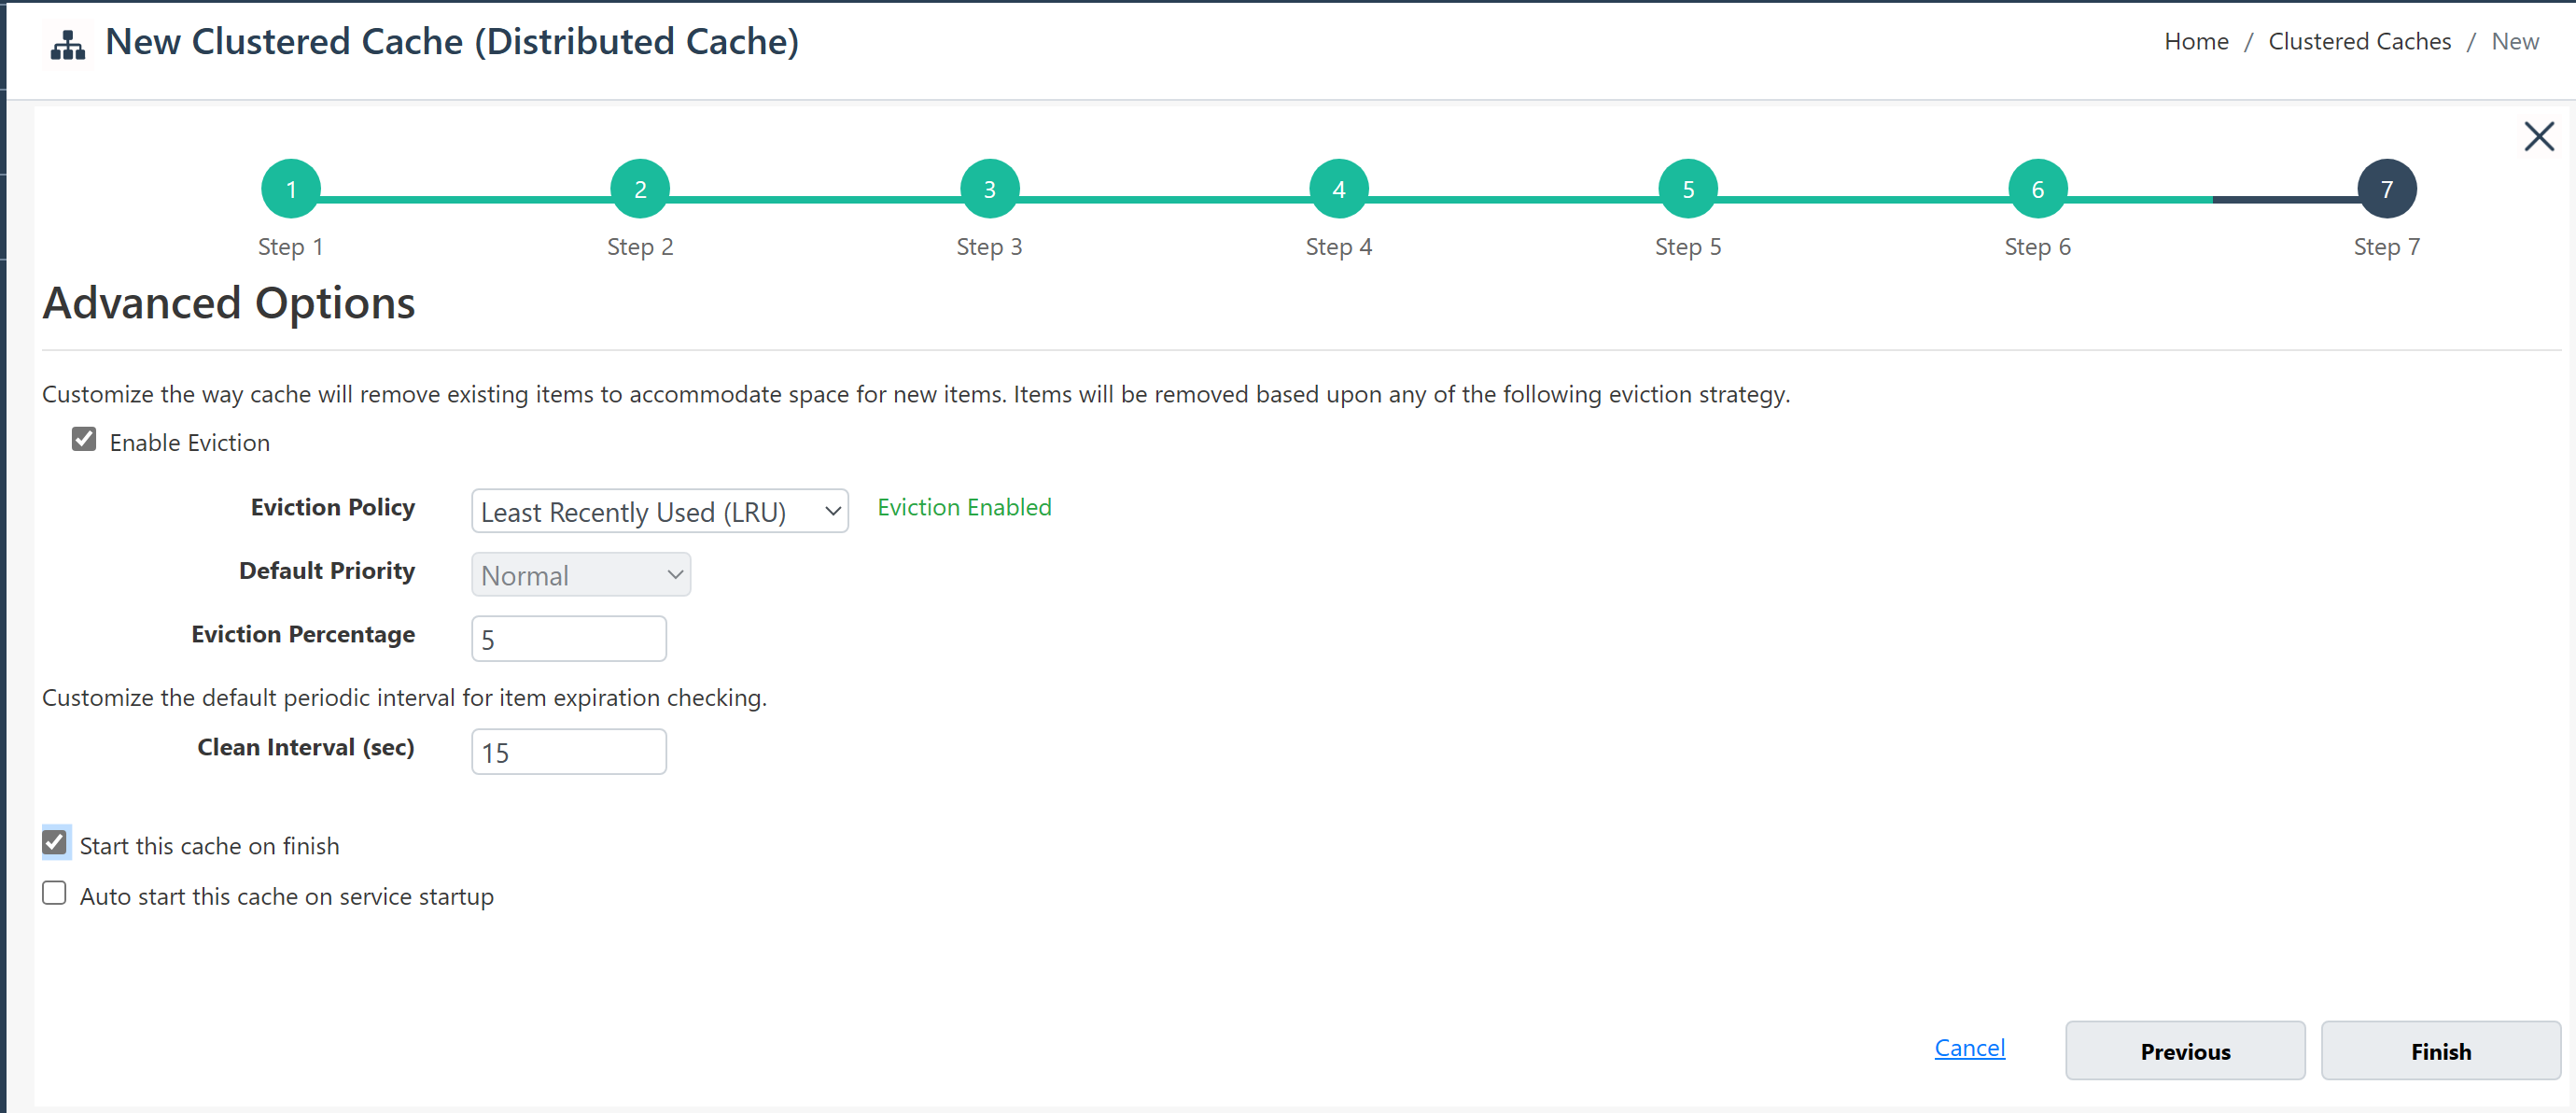
You can enable ejection and check other advanced options. In my case, I checked the cache run at the end. Finally click on Finish it. After the process is complete, a two-node clustered cache will be created and started. (10.0.0.4 and 10.0.0.5).
Now the cluster is formed.
Start the cache
You can use the launch option from the NCache Management Center to launch the clustered cache, as shown in the image below.
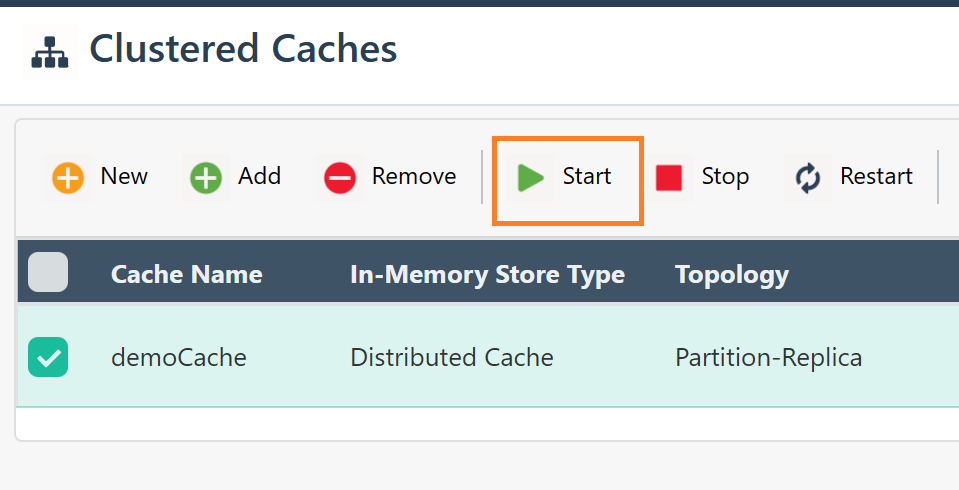
You can also use the command below to start the server:
start-cache –name demoCacheRun a stress test
Click Test-Stress and select the duration to run the stress test. This is one of my favorite features in the NCache Management Center where you can easily run a stress test with just a click of a button.
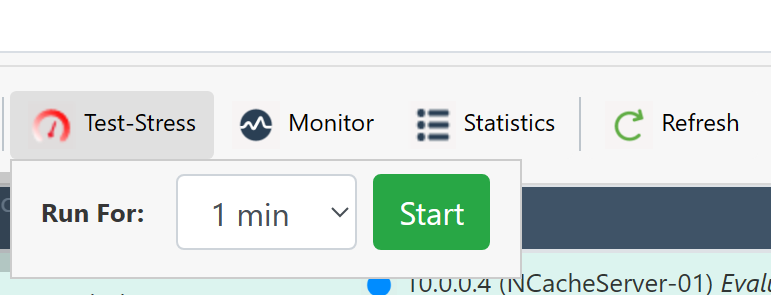
You can also use the commands below to start the server. For example, to run a Test-Stress for demoCache cluster with default settings:
test-stress –cachename demoCacheClick on Monitor to check metrics.
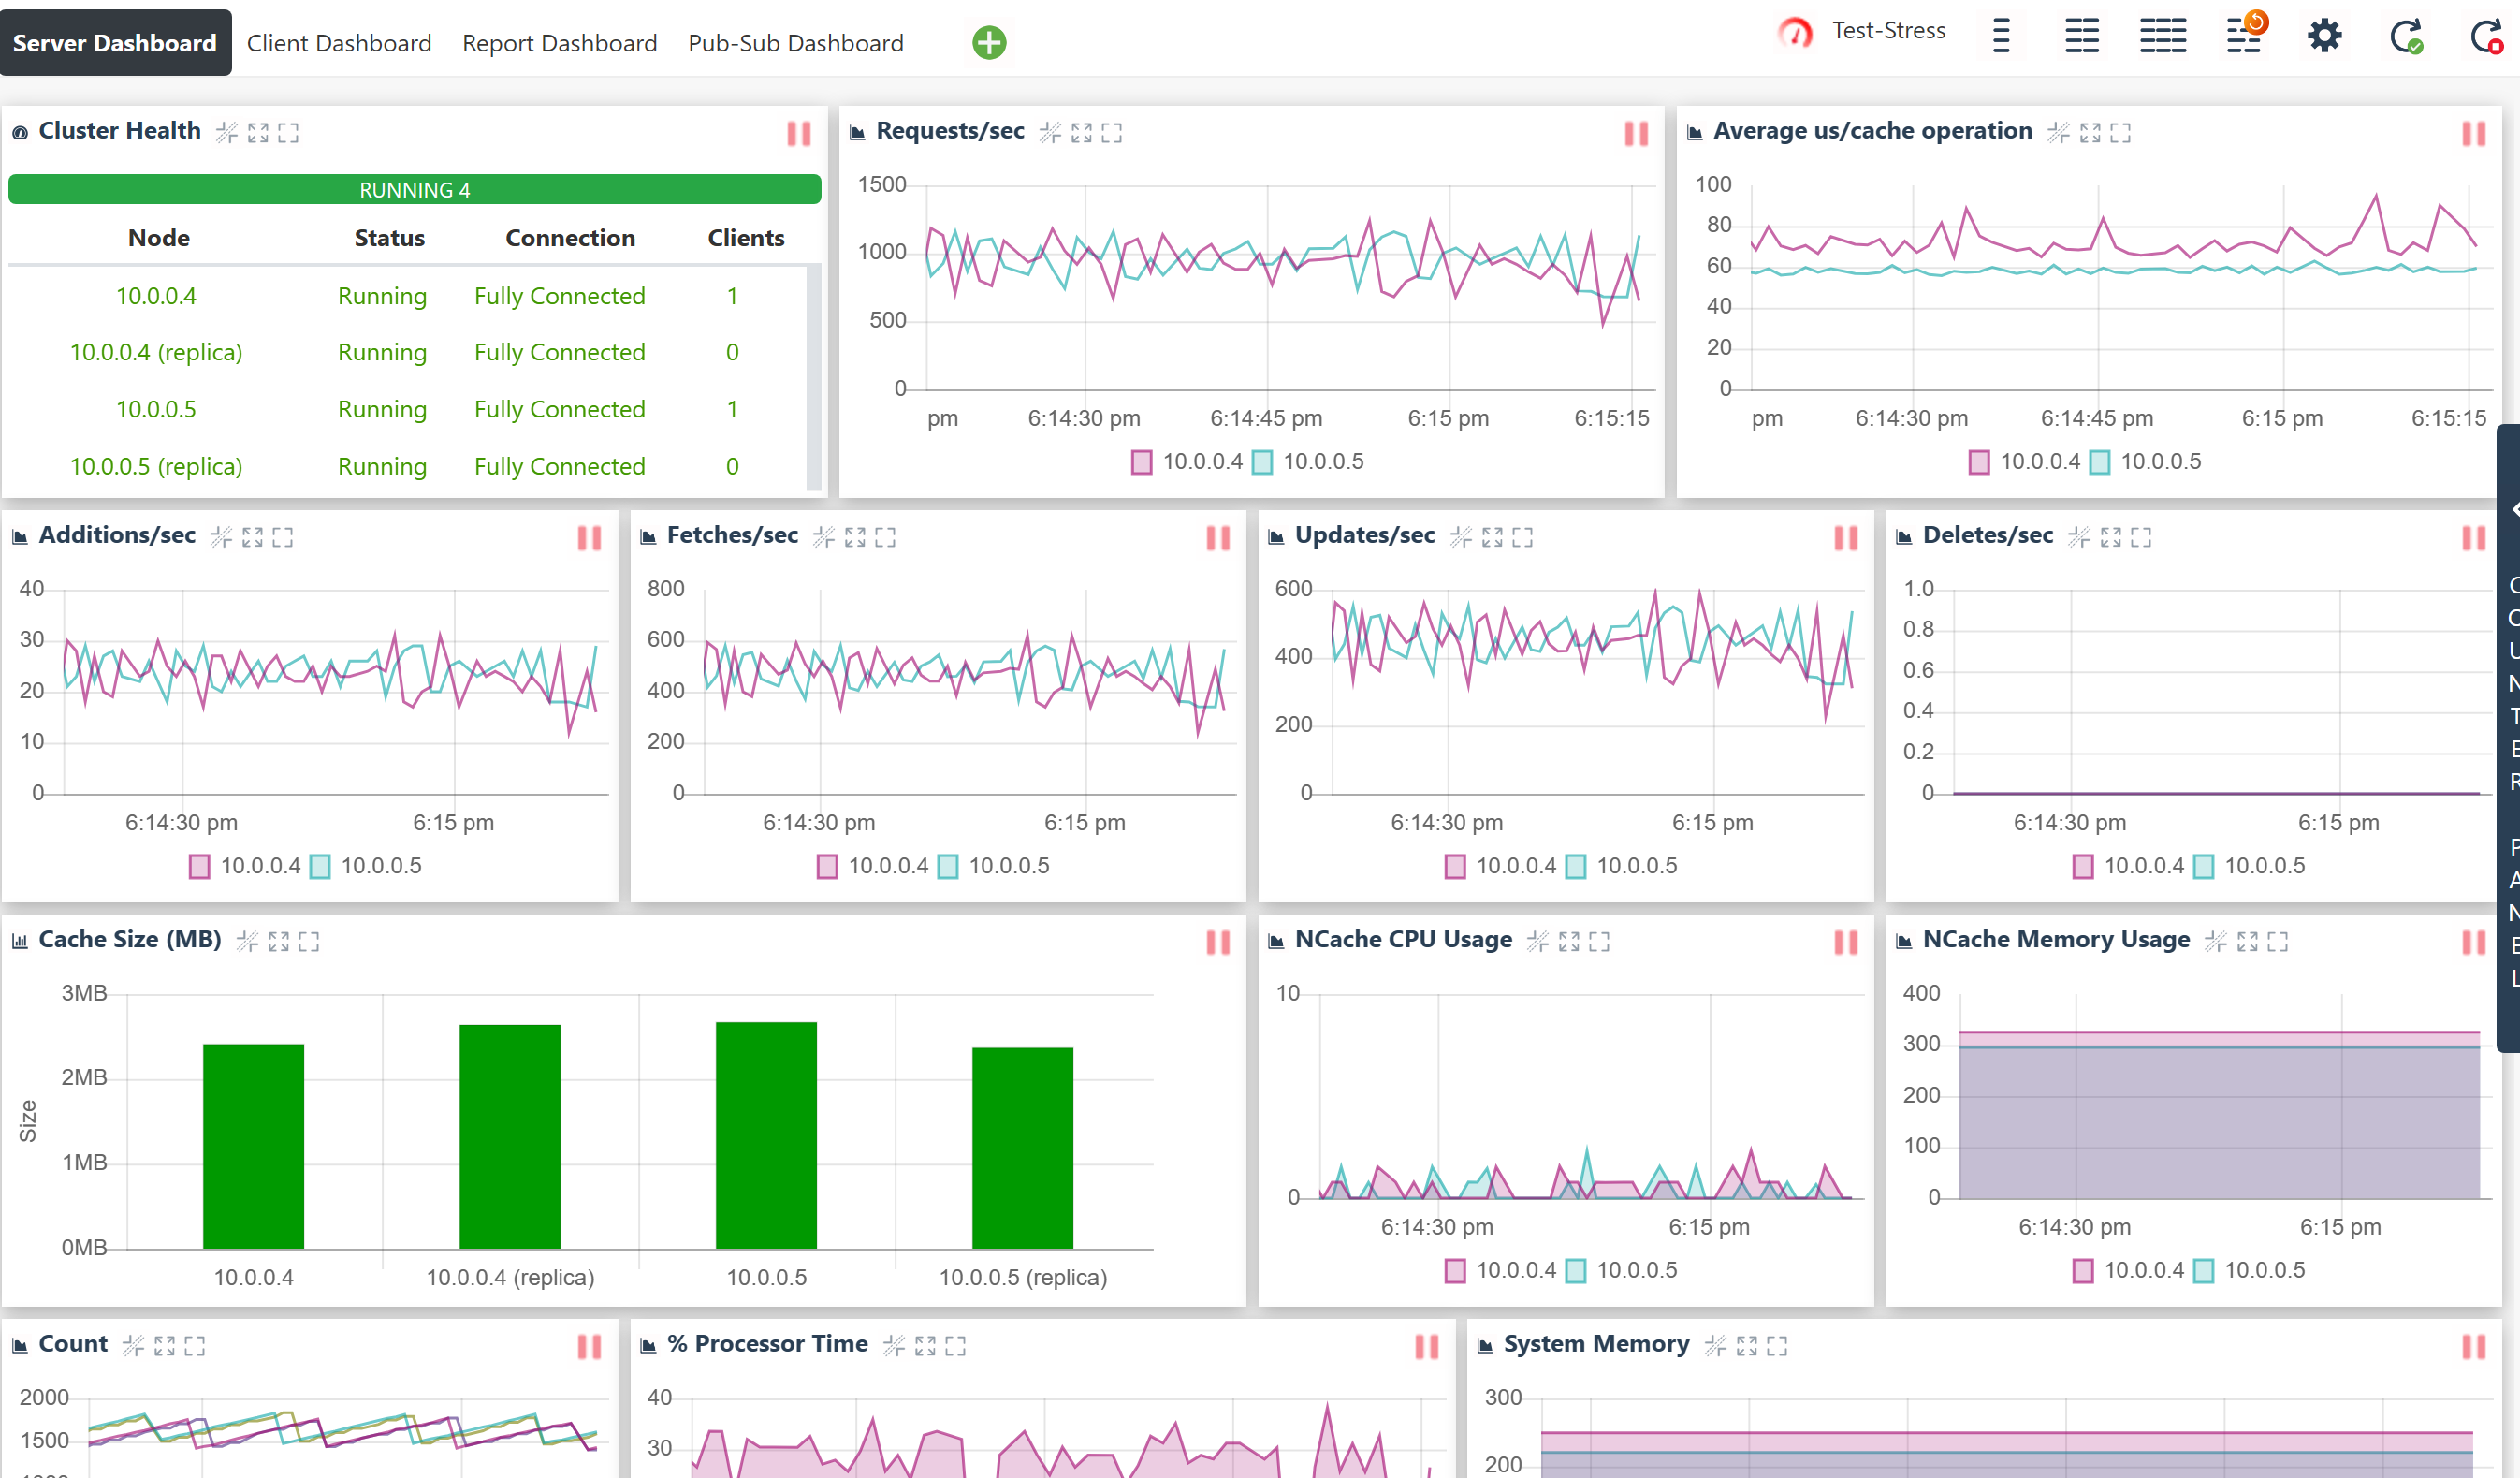
You can track the number of requests processed by each node.
Click on Statistics to get full clustered cache statistics.
SNMP counter to monitor NCache
Simple Network Management Protocol (SNMP) is a key system used to monitor and manage various network devices and their activities. It is part of the Internet Protocol suite and helps share important information about network health and performance between devices such as routers, switches, servers, and printers. This allows network administrators to change settings, monitor how well the network is performing, and receive alerts about any problems. SNMP is widely used and is important for the smooth and secure operation of networks. It is a vital part of managing and repairing networks.
NCache has made SNMP monitoring easier by now allowing counters to be published through a single port. Previously, each cache required a separate port.
Make sure the NCache service and monitoring cache(s) are running.
Configure the NCache service
The Alachisoft.NCache.Service.dll.config file located in the %NCHOME%\bin\service folder, provides the ability to enable or disable monitoring of cache counters via SNMP by changing certain options. These options are marked with special symbols.
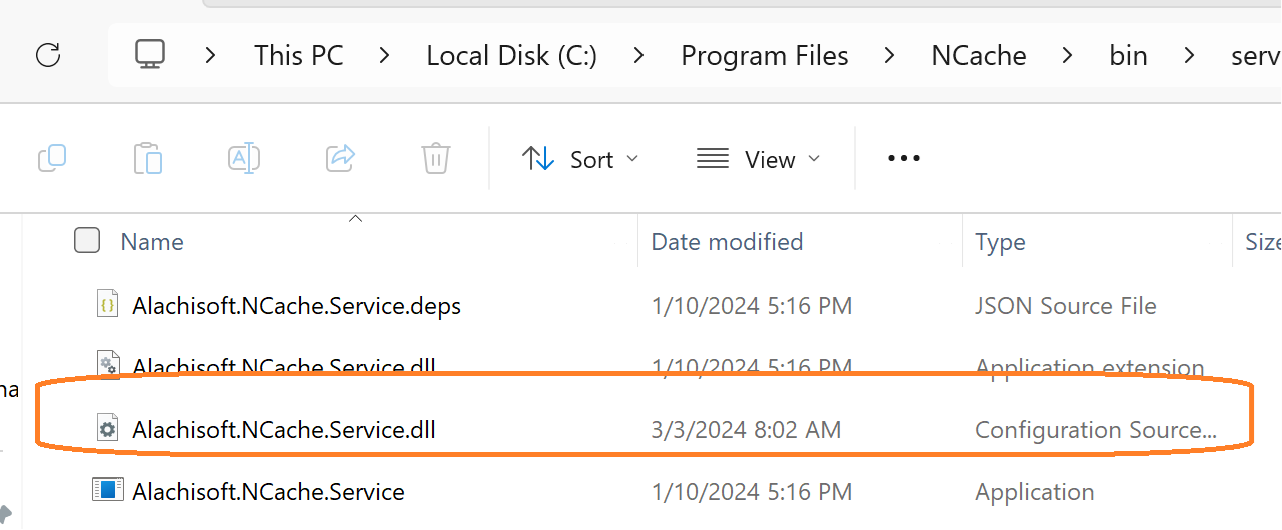
Update the value for the tags below:
<add key="NCacheServer.EnableSnmpMonitoring" value="true"/><add key="NCacheServer.SnmpListenersInfoPort" value="8256"/><add key="NCacheServer.EnableMetricsPublishing" value="true"/>
- Change it
NCacheServer.EnableSnmpMonitoringmark ontrueto enable or disable SNMP monitoring of NCache cache counters. Initially, this flag is turned off (false). - Change it
NCacheServer.SnmpListenersInfoPortmark ontrueto set up an SNMP port to listen on. The default port is 8256, but you can adjust it according to your needs. - Change it
NCacheServer.EnableMetricsPublishingflag to true if you want to start or stop sending metrics to the NCache service.

Remember to restart the NCache service after making the necessary adjustments to the service’s configuration files.
SNMP monitoring
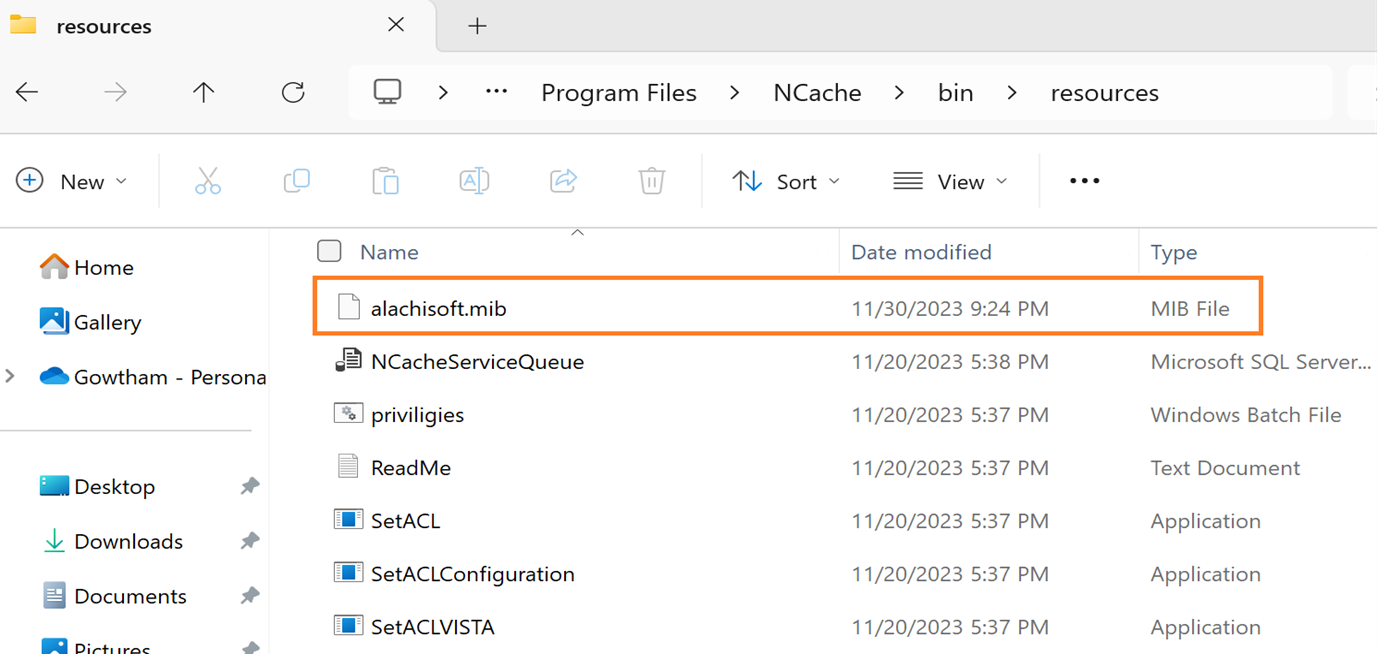
NCache has made available a single MIB file called alachisoft.mib which monitors various counters that can be verified using SNMP. This file tells you about the connectors used for different types of caches and client activity. You can find this file at %NCHOME%\bin\resources. To view these counters, you can use a program called MIB Browser Free Tool to view the MIB file.
Use port 8256 to connect to NCache and open the SNMP table View to check all NCache attributes as shown in the image below:
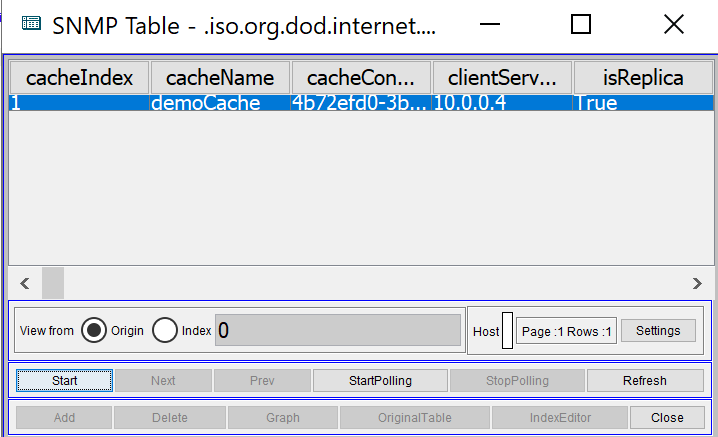
To check specific attribute details in the SNMP table, first select the attributes you want to view. I chose for the sample cacheName, cacheSize, cacheCount, fetchesPerSec, requestsPerSec, additionPerSec. Then click on View from the menu at the top before selecting the SNMP table. You will then see the counter values in a table as shown in the image below.

Abstract
This article provides a beginner-friendly guide on how to get started with NCache Java Edition, covering essential steps such as installing the NCache server, setting it up using a Docker image, running the cache, running a stress test to evaluate its performance, and monitoring its performance via JMX counters. It helps you get started with improving the speed and reliability of your Java application by implementing distributed caching with NCache.